The Ultimate Guide to Gel Nail Polish: Tips and Tricks
The Ultimate Guide to Gel Nail Polish
Gel Nail Polish has revolutionized the way we think about manicures and nail design. Unlike traditional nail polish, gel polish is a type of nail lacquer that requires curing under a UV or LED lamp. This process not only speeds up the drying time but also enhances the durability and longevity of your manicure. With a glossy finish that can last up to two weeks without chipping, Gel Nail Polish has become a favorite for those seeking beautiful, resilient nails.
One of the key advantages of Gel Nail Polish is its variety of colors and finishes. From classic shades to glittery and matte finishes, the options are nearly limitless. This versatility allows for endless creativity, making it perfect for any occasion, whether you’re attending a wedding, a business meeting, or just a casual outing. Additionally, gel polishes often include nourishing ingredients, allowing for healthier-looking nails with every application.
Applying Gel Nail Polish requires specific techniques and tools to achieve a salon-quality finish. The essence of a successful application lies in proper preparation and layering. Start by gently buffing the nails and cleaning them to ensure the polish adheres well. After applying a base coat, multiple layers of colored gel polish should be applied, each cured under the lamp for the best results. A top coat finishes off the look, adding an extra layer of shine and protection.
While the application process for Gel Nail Polish is straightforward, it’s important to avoid common mistakes that can compromise the longevity of your manicure. Applying too thick of a layer can lead to uneven curing and peeling, while neglecting to seal the edges may result in chips. Patience is key; ensuring each layer is completely cured before applying the next will lead to the best outcome.
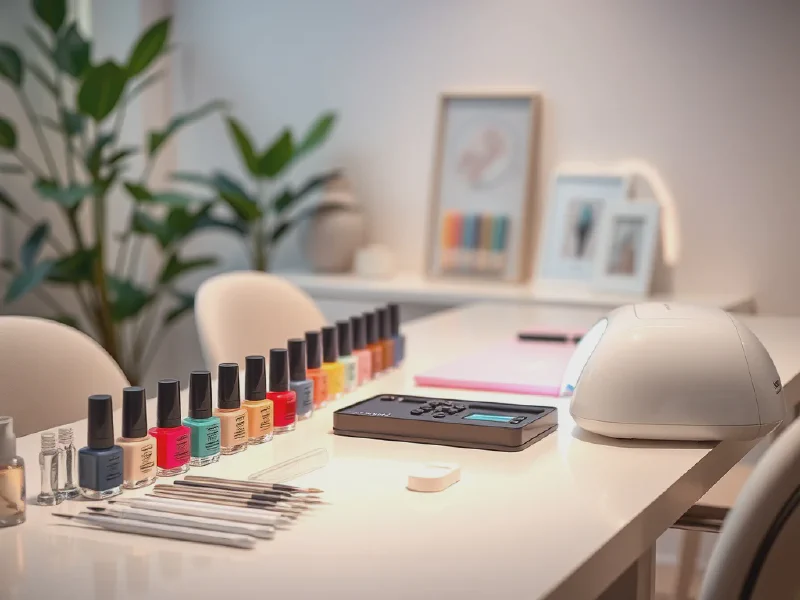
There are several tools and products that can enhance your gel manicure experience. Essential tools include a UV or LED lamp, nail files, cuticle pushers, and high-quality gel polish. Using a nail strengthener can also help prep the nails for the gel application, reducing the risk of damage. Having the right tools on hand means a smoother, more successful gel polish application.
Application Techniques for Gel Nail Polish
To achieve the perfect gel manicure, follow these steps for application: start with clean, dry nails, and push back your cuticles. Buff the surface of the nails lightly to remove shine, and wipe with nail cleanser. Apply a thin layer of base coat, cure as directed, then add one or two thin layers of your chosen gel color, curing after each one. Finish with a top coat and cure again, then clean off the sticky residue with a cleanser.
Avoiding common mistakes can save you time and ensure a perfect result. Some common pitfalls include not preparing the nails properly, applying too thick layers, not curing long enough, or skipping the top coat. Each of these can compromise the integrity of your manicure. Make sure to follow the steps closely for the best outcome.
The tools needed for a flawless gel manicure include a UV or LED lamp for curing, a nail file for shaping, cuticle tools for prep, and quality gel polish. A nail cleanser to remove any residue and a good topcoat are also essential for a long-lasting finish. Using high-quality products will ensure a better experience overall.
Removing Gel Nail Polish Safely
When it comes to removing Gel Nail Polish, there are a few effective methods. The most common way is to soak a cotton ball with acetone, place it on the nail, wrap it with foil, and wait about 10-15 minutes. After that, the polish should easily slide off. Another method is to use a gel nail polish remover which is designed specifically for this purpose.
To prevent damage during nail polish removal, it’s important to avoid pulling or scraping the polish off. Always use acetone or a dedicated remover to soften the gel first. Additionally, gently buff the surface before application and avoid using harsh chemicals afterward to maintain nail health.
There are times when seeking professional help for gel removal is advisable. If the polish becomes too difficult to remove or if you notice signs of damage to your nails (such as excessive peeling or tenderness), it may be best to visit a nail technician. They can safely remove the polish and help assess any damage done to the nails.
Design Ideas for Gel Nail Polish
When it comes to nail art, Gel Nail Polish provides endless possibilities. Trendy designs include ombre effects, negative space, and geometric patterns. Adding decals or using a dotting tool can complement the gel’s shine and allow for creative expressions. Seasonal designs can add a personal touch for holidays and changing trends.
Seasonal themes can also greatly influence your Gel Nail Polish designs. During the fall, warm tones and leaf patterns are popular, while winter might inspire sparkly blues and whites to mimic snow. Spring often brings floral designs and pastel colors, while summer is perfect for bright hues and tropical motifs.
Inspiration can also be drawn from popular nail influencers on social media. Following their tutorials and trying out their designs can lead to new ideas and techniques, pushing the boundaries of your gel nail artistry. Many influencers share tips and tricks, which can be valuable for both novice and experienced users.
DIY vs. Salon Gel Nail Polish
Doing Gel Nail Polish at home has its own set of pros and cons. On the positive side, it’s cost-effective and convenient, allowing you to experiment with styles at your leisure. However, it requires a learning curve to master the application technique and ensure a salon-quality finish. On the other hand, professional applications guarantee expertise but can be significantly more expensive.
The cost comparison between DIY and salon visits can vary greatly. A professional manicure can cost anywhere from $30 to $100 or more, depending on the design and locale. DIYing your nails can significantly reduce costs, as purchasing gel polish and tools can be a one-time investment that lasts for multiple applications.
To achieve a salon-quality finish at home, invest in high-quality products, take your time with the application process, and practice regularly. Watching tutorials online can also help you refine your technique. Remember to prepare your nails properly and avoid rushing through the curing process.
Aftercare for Gel Nail Polish
After your gel polish application, caring for your nails is crucial for maintaining their health and the longevity of your manicure. Keep nails hydrated with cuticle oil and a good hand moisturizer to prevent dryness and cracking. Additionally, wearing gloves when doing chores can protect your nails from damage.
Best products for nourishing nails post-gel application include vitamin-rich oils, strengthening serums, and nourishing hand creams. Look for products containing jojoba oil, vitamin E, and shea butter for optimal results. Regular care will keep your nails healthy, shiny, and strong.
Signs of damage to look out for include excessive peeling, weakness, and discoloration. If you spot any of these, consider taking a break from gel applications or consulting with a skincare professional. Addressing these issues quickly can help maintain the overall health of your nails.