Ombre Nail Art: A Step-by-Step Guide to Perfection
The Art and Allure of Ombre Nail Art
Ombre Nail Art has taken the nail art world by storm, offering a stylish way to blend colors seamlessly, creating a look that is both sophisticated and edgy. This versatile technique can be used with a myriad of shades, allowing for creativity and personalization in nail design. The transition from one color to another in ombre nail art creates a stunning gradient effect that can enhance any manicure, making it a favorite among nail enthusiasts and professionals alike.
The beauty of Ombre Nail Art lies in its ability to cater to different tastes and styles. Whether you prefer soft pastels for a delicate look or bold and vibrant colors for a statement, the ombre technique can be adapted to fit your vision. This nail art method isn't just for long nails; it can be beautifully applied to short nails, making it accessible for everyone. Additionally, ombre nail art is perfect for both casual wear and special occasions, adding a touch of glam to any outfit.
Creating Ombre Nail Art can be a fun and fulfilling process, but a little technique and practice go a long way. The key to a perfect ombre is blending the colors seamlessly, which can be achieved using different tools and methods. Once you master the basic techniques, you can explore more advanced styles and incorporate different elements, such as glitter and patterns, to elevate your nail art game.
In this article, we will explore the essentials of Ombre Nail Art, including foundational techniques, step-by-step tutorials, and advanced designs. We will also discuss caring for your nails post-application to ensure your ombre nails remain vibrant and healthy. Whether you're a beginner or looking to refine your skills, this guide will equip you with the knowledge and inspiration needed to create stunning ombre nails.
So, let’s dive deeper into the world of Ombre Nail Art and discover what makes this nail art trend so captivating!
Ombre Nail Art Basics
Understanding ombre nail art is fundamental for anyone looking to create this beautiful design. The term 'ombre' means to shade or gradate colors from light to dark. In nail art, this means using a combination of shades to create a smooth transition. There are several techniques to achieve the ombre effect, such as the sponge method, brush blending, or even using nail polish strips. Each method offers a unique finish, allowing for personal creativity in how you achieve the gradient look.
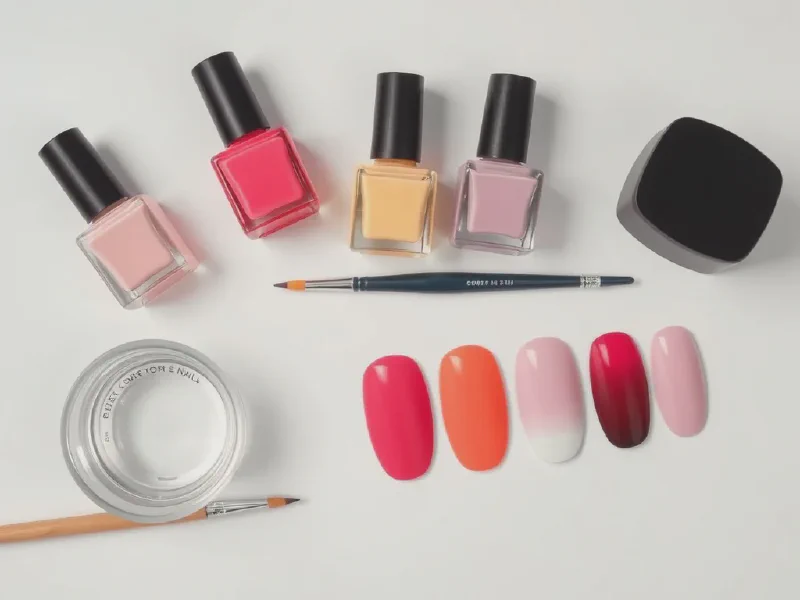
Essential tools for ombre nail art include a few basic items: a base coat, the nail polishes in your chosen colors, a makeup sponge (for the sponge technique), a striping brush (for finer details), and a top coat to finish off your design. It's also helpful to have clean-up tools, such as cotton pads and nail polish remover, to tidy up around the cuticles and on the skin after creating your ombre look.
Common ombre nail color combinations include classic shades like light pink fading into white, vibrant blues transitioning into deeper navy, or even unexpected mixes like orange to yellow for a sunset effect. The possibilities are endless when it comes to color selection, allowing you to create numerous unique styles that reflect your personality and mood.
Step-by-Step Ombre Nail Tutorial
Preparing your nails for ombre art is essential for achieving the best results. Start with clean, dry nails. Push back your cuticles and file your nails to your desired shape. Apply a base coat to protect your natural nails and allow it to dry completely before moving on to the next steps.
Applying the base color for ombre is a vital step in the process. Choose a lighter shade as your base and apply it evenly to all nails. This color will serve as the foundation for your ombre design. Make sure to let it dry thoroughly to prevent mixing with your ombre shades.
Achieving the perfect ombre gradient requires technique and practice. If using the sponge method, apply the darker polish to a makeup sponge, then dab it onto the tips of your nails, gradually dabbing less as you move toward the base color. Repeat the process until you achieve your desired gradient. If using a brush, gently blend the colors together on the nail, working from the tip toward the cuticle. Finish with a top coat to seal your design and add shine.
Advanced Ombre Techniques
Reverse ombre nail art designs are a fun twist on the classic technique. Instead of having the lighter color at the base and the darker shade at the tips, the reverse ombre features the darker color at the base, fading into lighter shades toward the tips. This technique works particularly well with vibrant colors and can create a striking appearance.
Using nail sponges for gradient effects can enhance your ombre art. By layering colors on a sponge and stamping them onto the nails, you can achieve a professional-looking blend with minimal effort. The sponge not only helps in blending but can also lend a textured look to your nails, making the design stand out even more.
Incorporating glitter in ombre nails is an excellent way to add sparkle and glamour to your nails. After achieving the desired ombre gradient, apply a fine glitter polish over the tips or the entire nail for a stunning effect. The glimmering particles will reflect light beautifully and elevate your overall ombre look.
Ombre Nail Art for Special Occasions
Ombre nail designs for weddings are a popular choice for brides looking for elegant nail art. Soft pastel ombres, such as blush pink fading into white or cream, create a delicate and romantic appearance that complements bridal attire beautifully. For bridal parties, matching ombre shades can create a cohesive look that stands out in photos.
Seasonal ombre nail art ideas can be a fun way to celebrate different times of the year. Think warm hues of red, orange, and yellow for autumn, icy blues and whites for winter, or vibrant pinks and greens for spring. Each season offers a palette of colors that can be blended to create stunning ombre designs that reflect the spirit of the time.
Festive ombre patterns for holidays can add a playful touch to your celebrations. Consider incorporating red and green for Christmas, black and orange for Halloween, or pastel shades for Easter. These creative ombre designs help to spread cheer and celebrate the festive spirit with style.
Nail Care for Ombré Nail Art
Best practices for nail health are crucial to maintaining beautiful ombre nails. Always start with a base coat to protect your nails from staining and damage. Additionally, keep your nails moisturized and use cuticle oil regularly to maintain nail health and prevent dryness.
Top coats that enhance ombre designs are essential for preserving the longevity and vibrancy of your nails. Opt for quick-dry top coats that add shine without dulling your ombre effect. Some top coats also contain ingredients that can help extend the wear of your nail art, making your ombre designs last longer.
Repairing and maintaining ombre nails involve gentle care. If your nails chip, be sure not to pick at the polish. Instead, apply more polish over the chipped area, or re-do the entire nail if necessary. Keep an eye on the overall maintenance of your nails, and always follow up with nourishing treatments to support nail growth.